The Ultimate Guide to Measuring for Replacement Windows: Beyond the Video Tutorial
Getting ready to replace your windows? That’s an exciting home improvement project that can boost your comfort, curb appeal, and energy efficiency. You might have found a helpful video tutorial, but a short clip often leaves you with more questions than answers. How do you handle an uneven opening? What about those tricky brick mold frames? This comprehensive guide dives deep into the entire process of measuring for replacement windows, transforming a basic video concept into the only resource you’ll need. We’ll cover the critical steps, common pitfalls, and special scenarios that most quick tutorials miss, ensuring you get it right the first time.
Why Precision in Measurement is Non-Negotiable
An inaccurate window measurement isn’t just a minor inconvenience; it’s a costly mistake. A window that’s even a quarter-inch too large simply won’t fit into the existing opening, leading to frustrating returns, re-ordering delays, and additional shipping costs. On the flip side, a window that’s too small creates gaps that compromise your home’s insulation, allowing drafts, moisture, and pests to enter. This undermines the very purpose of installing new, energy-efficient windows. Taking the time to measure correctly protects your investment and ensures a seamless installation process.
Gearing Up: Your Pre-Measurement Checklist
Before you grab your tape measure, a little preparation sets the stage for success.
Essential Tools:
A sturdy, metal retractable tape measure (cloth tapes can stretch and give inaccurate readings).
A notepad and pen for recording each measurement clearly.
A pencil for marking.
A small level to check for square openings.
A flashlight to see into deep window jambs.
Safety & Preparation:
Clear the area around the window inside and out. Move furniture, plants, and decor.
Remove blinds, shades, or curtains to get an unobstructed view of the entire frame.
Have a step ladder ready if your windows are high up, and ensure it’s on stable ground.
Wear gloves if your existing window has rough or splintered wood.
The Step-by-Step Measurement Process
Follow this sequence for each window, remembering to measure every one individually—even if they look identical. Old homes rarely have perfectly uniform openings.
Step 1: Measuring the Width
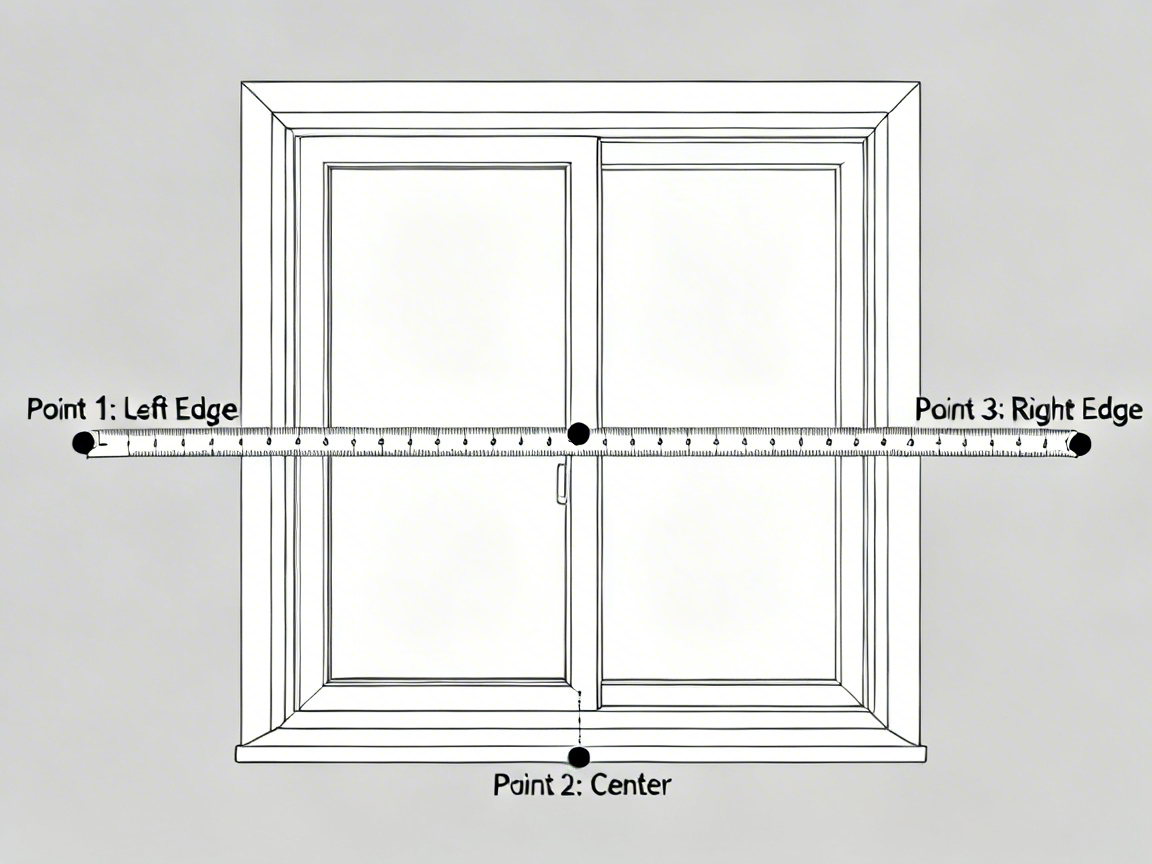
Always measure the width in three places: at the top of the window opening, at the middle, and at the bottom. Place your tape measure horizontally inside the window jamb (the vertical sides of the frame). Record all three numbers to the nearest 1/8th of an inch.
Step 2: Measuring the Height
Similarly, measure the height in three places: along the left side, the middle, and the right side. Place your tape measure vertically from the inside top of the opening (the header) down to the windowsill. Again, record all three measurements to the nearest 1/8th of an inch.
Step 3: Checking for Square and Depth
Use your level to check if the sill and header are perfectly horizontal and the side jambs are vertical. An out-of-square opening requires special attention. Finally, measure the depth of the window opening from the interior trim to the exterior trim. This is crucial to ensure the new window unit will fit within the wall’s thickness.
Step 4: Recording Your Numbers
This is the most critical step. Always use the smallest measurement you recorded for both the width and the height. Manufacturers will subtract a small amount (typically 1/4 inch) from these numbers to create the “unit size,” ensuring the window can be easily installed and shimmed into place. Clearly label each measurement with the window’s location (e.g., “Front Bedroom, Window 1”).
Navigating Special Cases and Complex Openings
Most tutorials show a perfect, rectangular opening. Reality is often different.
Brick Mold or Cased Openings: For windows with exterior brick mold trim, you typically measure the rough opening width and height between the framing studs. This is a larger measurement than the interior jamb-to-jamb method.
Non-Standard Shapes: Arched, circular, or trapezoid windows require a professional assessment. Provide the overall width and height at the tallest/widest points, and consider having a template made.
Older Home Quirks: In very old homes, openings can be significantly out of square. In these cases, you may need to provide the diagonal measurements (from top left to bottom right and top right to bottom left) to the manufacturer so they can assess the variance.
Common Measuring Mistakes and How to Sidestep Them
1. Measuring Only Once: The single biggest error is measuring at just one spot. Openings settle and warp. The three-measurement rule is your best defense.
2. Measuring the Old Window Sash: You are replacing the entire window unit, not just the moving part (the sash). Always measure the opening itself.
3. Forgetting to Subtract for Clearance: Remember, your recorded smallest measurement is not the final order size. The manufacturer will make the necessary deductions.
4. Assuming Identical Sizes: Never assume two windows are the same. Measure each one, every time.
From Measurements to Installation: Your Next Steps
Once you have your numbers, you’re ready to move forward. If you’re ordering vinyl windows, you’ll provide these measurements to your supplier. A high-quality UPVC window supplier will often have a specialist review your figures, especially for complex orders. They can confirm if a custom size is needed or if your window fits a standard stock size, which can save money and time.
Finally, decide if this is a DIY project or if you’ll hire a professional. While installing a pre-measured replacement window can be manageable, factors like multi-story homes, complex flashing, or structural rot are clear signs to call an expert.
Q&A Section
Q: I’ve measured three times and got three different heights. What do I do?
A: This is common, especially in older homes. Use the smallest of the three height measurements you took. This ensures the new window will definitely fit into the tightest part of the opening. The installer can then use shims to center and square it within the larger space.
Q: What’s the difference between “frame size” and “rough opening size”?
A: The frame size (or unit size) is the exact dimensions of the new window unit you will order. The rough opening size is the larger measurement of the structural opening in your wall, between the wooden studs. The window frame fits inside the rough opening, with a gap of about 1/4 to 1/2 inch on all sides for adjustment and insulation.
Q: My window has a rounded top. How do I measure for a replacement?
A: Arched or radius windows are specialty items. You should measure the total width at the base (where it’s rectangular) and the total height from the base to the very peak of the arch. It is highly recommended to contact your window supplier for a professional site measurement for these types of units, as they often require a precise template.
Q: Do I need to measure the depth for all types of replacement windows?
A: Yes, depth is crucial. It determines whether you need a “pocket” replacement (which fits inside the existing frame) or a “full-frame” replacement (which replaces the entire frame). Most standard UPVC window replacements are designed for pocket installation, but verifying the depth confirms compatibility with your wall construction.