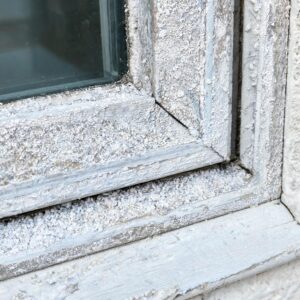
The Complete Guide to Replacing Old Wood Windows with Modern PVC Alternatives
For many homeowners, the decision to replace aging wooden windows marks a significant home improvement milestone. While a popular video tutorial provides a visual walkthrough of the removal and installation process, a truly successful project requires a deeper understanding. This comprehensive guide expands on the core steps, addressing critical questions left unanswered and transforming a basic tutorial into a foolproof plan. We’ll cover everything from the initial “restore or replace?” dilemma to the final bead of caulk, ensuring you have the confidence to tackle this upgrade.
Why Replace Wood Windows? Understanding Your Options
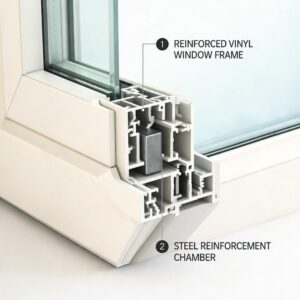
Before swinging a hammer, it’s crucial to assess whether replacement is the best path. Original wood windows have charm, but decades of exposure can lead to rot, warping, difficult operation, and significant energy loss due to failed seals and poor insulation. While restoration is a viable option for historically significant homes, modern vinyl windows (often referred to as UPVC or PVC windows) offer compelling advantages: superior energy efficiency, minimal maintenance, and excellent long-term value without the need for painting or sealing.

Essential Tools and Materials Checklist
Gathering the right equipment before you start is half the battle. Here’s a detailed list beyond the basics:
Safety & Prep: Safety glasses, heavy-duty work gloves, a NIOSH-rated respirator (crucial for pre-1978 homes due to potential lead paint dust), drop cloths, and a sturdy ladder.
Removal Tools: Utility knife, flat pry bar, cat’s paw or larger wrecking bar, hammer, reciprocating saw with wood/ metal blades, and a cordless drill/driver.
Installation Tools: 4-foot level, tape measure, shims (composite or cedar), caulking gun, exterior-grade silicone or polyurethane sealant, expanding foam for gaps, and a nail set.
Materials: Your new PVC window unit, exterior trim coil or pre-formed brickmould (if needed), finishing nails, and interior trim/casing.
Step-by-Step: From Careful Removal to Flawless Installation
Step 1: Safety and Preparation – The Non-Negotiables
Begin by clearing the work area inside and out. Cover floors and furniture with drop cloths. If your home was built before 1978, assume paint contains lead. Use a respirator, avoid dry sanding, and carefully wet-scrape debris onto a tarp for proper disposal. This step protects your family’s health and is often overlooked in basic guides.
Step 2: The Art of Accurate Measurement
This is the most critical step for a successful install and a common point of confusion. You are measuring the rough opening—the wooden frame within the wall studs.
Width: Measure at the top, middle, and bottom of the opening. Record the smallest measurement.
Height: Measure from the sill to the header on the left, center, and right. Again, use the smallest measurement.
Squareness: Measure diagonally from corner to corner. If the measurements differ by more than 1/4 inch, your opening is out of square, which must be accounted for during installation with shims.
Always provide these exact measurements to your supplier for a proper fit. Ordering a “window size” is different from ordering for a “rough opening.”
Step 3: Removing the Old Wood Window Frame
Carefully remove the interior trim (casing) using a pry bar. Next, you’ll likely encounter the old window sash (the moving part) held by stops. Pry these off to remove the sashes. For a full-frame replacement, you must remove the entire wood frame. Cut through the nails securing the frame to the rough opening using a reciprocating saw. Gently pry the frame out in one piece if possible. For a retrofit (or “insert”) installation, you leave the original exterior frame intact—a key distinction not always clarified.
Step 4: Preparing the Rough Opening
Inspect the exposed opening for rot, insect damage, or moisture. Replace any compromised wood. Ensure the sill is sloped slightly downward toward the exterior for proper drainage. Apply a bead of sealant along the exterior sill and the back of the exterior flange (if your new window has a nailing flange) to create a secondary water barrier.
Step 5: Installing the New PVC Window Unit
With help, set the new window into the opening from the outside. Do not force it. From inside, use your level to ensure the unit is perfectly plumb (vertical) and level. This is vital for operation and sealing. Insert shims at the sides and bottom near the screw locations to hold this position—avoid over-shimming, which can distort the frame.
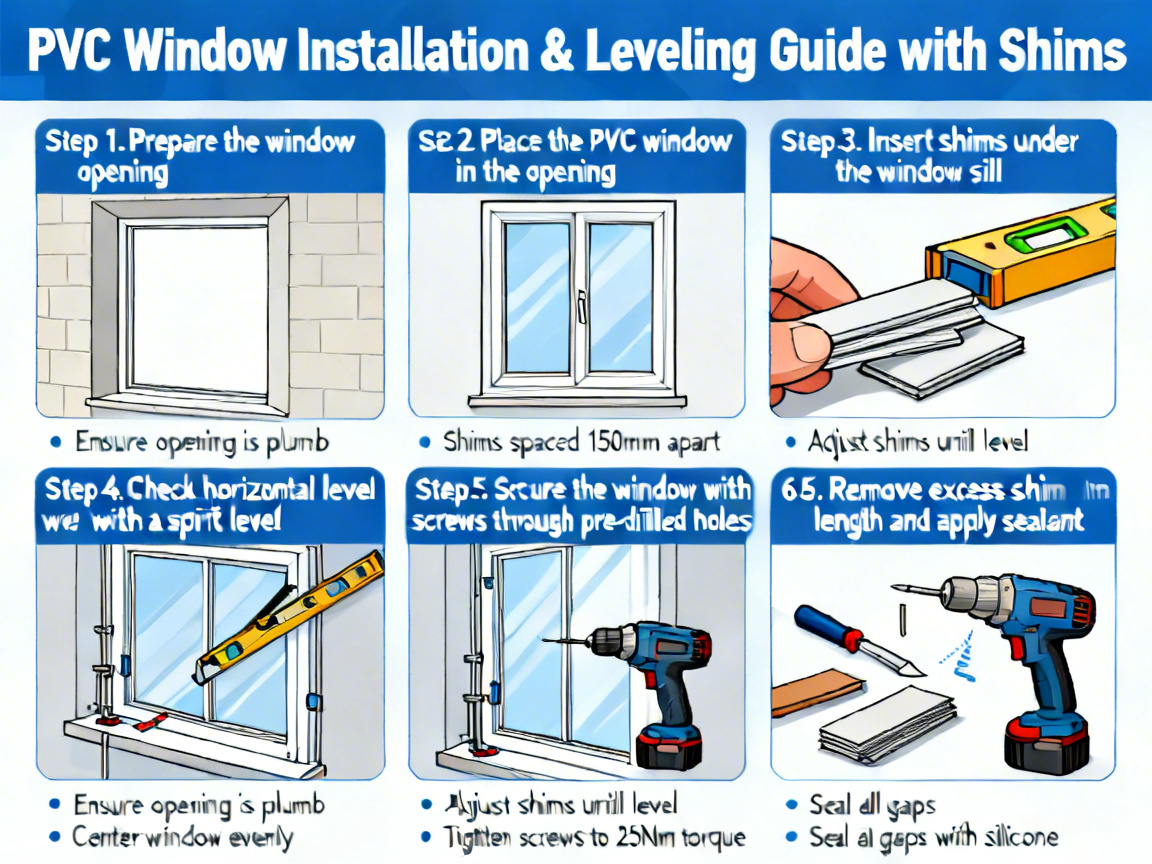
Secure the window according to the manufacturer’s instructions, typically by driving screws through the frame (or nailing the flange) into the rough opening through the shims. This locks the window in its level position. Re-check for square and operation by gently opening and closing the sash.
Step 6: Sealing and Insulating for Maximum Efficiency
From the interior, apply low-expansion foam sealant in the gap between the window frame and the rough opening. Fill about 2/3 of the cavity; the foam will expand. This is a crucial step for air sealing and insulation that basic tutorials sometimes rush. Once cured, trim any excess foam. On the exterior, apply a continuous, smooth bead of high-quality, UV-resistant sealant around the entire perimeter where the window meets the siding or brickmould.
Step 7: Interior and Exterior Finishing
Reinstall or install new interior trim, caulking the seam where it meets the wall. Externally, if you performed a full-frame replacement, you may need to install new brickmould or trim coil, sealing all joints meticulously.
Critical Insights: Avoiding Common Pitfalls
Mistake: Ignoring the Weather. Never install during rain or if freezing temperatures are imminent, as sealants and foam require proper conditions to cure.
Mistake: Over-Tightening Screws. This can warp the PVC frame, binding the sash. Tighten until snug and the window is secure.
Mistake: Poor Caulking. A thin, messy bead will fail. Use a caulking tool or your finger (with water) to tool the sealant into a smooth, concave bead that sheds water.
Mistake: Wrong Window Type. Know the difference between a full-frame replacement (for severely damaged frames) and a retrofit insert (for structurally sound existing frames).
Q&A: Your Top Window Replacement Questions Answered
Q: How do I know if I need a full-frame replacement or a retrofit insert window?
A: A retrofit insert is installed within the existing, structurally sound wood frame. It’s less invasive and preserves interior/exterior trim. A full-frame replacement is necessary if the old wood frame is rotted, damaged, or you want to change the window size or style. It allows for a complete resealing of the rough opening.
Q: What’s the single most important factor for a leak-free installation?
A: Proper flashing and sealing at the head (top) of the window. Water runs downhill, so ensuring the top seal is impeccable and integrated with your housewrap or siding is paramount. Always follow the manufacturer’s “water management” instructions.
Q: Can I install a PVC window by myself?
A: While a determined DIYer can handle it, these units are large and awkward. Having a second person is highly recommended for safe lifting, positioning, and holding the window level during securing. For second-story installations, professional help is strongly advised.
Q: How long should a quality UPVC window installation last?
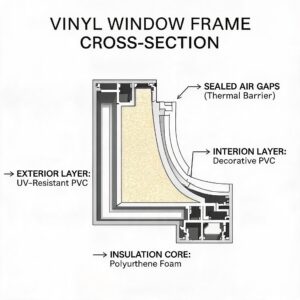
A: When installed correctly, a modern PVC window should provide trouble-free performance for 20-30 years or more. The longevity is a combination of the window’s quality materials (multi-chambered frames, durable seals) and, just as importantly, the precision and care taken during its installation.