The Ultimate Guide to Installing and Planting Window Boxes: A Professional’s Blueprint
Adding window boxes is one of the most charming and impactful ways to elevate your home’s curb appeal. It’s a project that blends carpentry with gardening, requiring both structural know-how and a creative touch. While a popular video from a trusted home improvement source provides an excellent visual guide, a truly successful installation demands a deeper dive into the details. This comprehensive guide expands on those foundational steps, offering pro tips, material insights, and solutions to common pitfalls to ensure your flower boxes are not only beautiful but built to last for seasons to come.
Why Proper Installation is Non-Negotiable
A window box filled with withering plants or, worse, one that detaches from your siding, is a disappointment and a potential hazard. The goal is to create a secure, durable foundation that supports healthy plant life. This involves understanding the anatomy of your exterior wall, selecting the right hardware, and implementing waterproofing strategies that protect your home’s integrity. A haphazard approach can lead to water damage, rot, and costly repairs—issues completely avoidable with careful planning and execution.
Pre-Installation Planning and Material Selection
Before you drill a single hole, spend time on this critical phase.
Assessing Your Wall and Choosing Mounting Hardware:
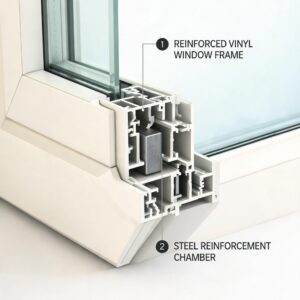
The type of siding on your home—vinyl windows, wood, brick, or fiber cement—dictates the fastening method. For most wooden window frames or sturdy trim, heavy-duty L-brackets are ideal. However, if you’re attaching directly to vinyl siding, you must locate the wooden sheathing beneath. Using a stud finder is crucial. For brick or stucco, you’ll need masonry anchors and a corresponding drill bit.
Selecting the Window Box Itself:
Consider materials like cedar or redwood for natural rot-resistance, or high-quality PVC planters for minimal maintenance. Ensure any wooden box has drainage holes and consider lining it with a copper or zinc strip to inhibit algae and rot. The size of the box should be proportional to your window; a good rule of thumb is that the box’s length should be roughly the same as the window’s width.
The Essential Tool and Supply List:
Beyond basic drills and levels, gather these items:
Exterior-grade caulk & caulk gun: For sealing drill holes.
Butyl rubber tape or silicone sealant: To create a waterproof gasket between the bracket and the siding.
Stainless steel or coated deck screws: They resist rust and corrosion.
Shims: For ensuring the box sits perfectly level on uneven brackets.
A helper: An extra pair of hands is invaluable for holding the box in place during marking and mounting.

Step-by-Step Professional Installation Technique
Step 1: Bracket Placement and Marking
Hold the bracket in the desired position, typically 2-4 inches below the windowsill. Use a 4-foot level to ensure it’s perfectly horizontal. Mark the screw holes with a pencil. For multiple brackets, measure carefully from a fixed point (like the window corner) to ensure consistent spacing and alignment.
Step 2: Drilling Pilot Holes and Waterproofing
Drill pilot holes slightly smaller than your screw diameter. This prevents the siding from splitting and allows for easier driving. Here’s a critical pro tip: Before inserting the screw, fill each pilot hole with a dab of exterior-grade, paintable caulk. This creates a waterproof seal around the screw shaft, preventing moisture from seeping into your wall structure—a detail often overlooked in basic guides.
Step 3: Securing the Brackets
Apply a bead of butyl tape to the back of the bracket where it contacts the siding. This acts as a gasket. Secure the bracket with your screws, driving them snug but not so tight that you distort the bracket or crush the siding.
Step 4: Mounting and Leveling the Box
With the brackets secured, have your helper hold the window box in place. Check for level front-to-back and side-to-side. It’s common for brackets to be perfectly level while the box itself may rock. Use composite or cedar shims between the box and the bracket to eliminate any wobble and ensure perfect leveling. Once level, secure the box to the brackets from the inside using screws.
The Art of Planting for Lasting Beauty
A secure box is only half the story. How you plant it determines its visual success and horticultural health.
Creating a Self-Watering Reservoir (A Game-Changer):
To reduce watering frequency and prevent plant stress, create a simple reservoir. Before adding soil, place a layer of empty, capped plastic water bottles or a block of floral foam at the bottom of the box. Cover this with a piece of landscape fabric. This layer creates an air gap that holds excess water, allowing the soil to wick moisture upward as needed, preventing soggy roots.
Soil and Plant Selection:
Never use heavy garden soil. Opt for a high-quality, lightweight potting mix designed for containers. It drains well and provides necessary aeration.
For plant combinations, follow the “Thriller, Filler, Spiller” formula:
Thriller: A tall, focal-point plant (e.g., dwarf ornamental grass, salvia, snapdragons).
Filler: Mid-height, bushy plants that add volume (e.g., geraniums, petunias, coleus).
Spiller: Cascading plants that soften the edges (e.g., ivy, sweet potato vine, trailing lobelia).
Watering and Maintenance Strategy:
Water thoroughly after planting until water runs from the drainage holes. The frequency will depend on sun exposure and weather. A weekly dose of liquid fertilizer during the growing season will keep plants vigorous. Regularly deadhead spent blooms to encourage continuous flowering.
Frequently Asked Questions (Q&A)
Q: How much weight can a typical window box bracket hold?
A: Quality metal L-brackets can typically support 50-75 pounds when properly installed into wall studs or solid wood. A fully saturated window box can be very heavy, so never skimp on bracket quality or mounting security.
Q: Can I install window boxes on vinyl siding without causing damage?
A: Yes, absolutely. The key is to seal the pilot holes with caulk as described. This prevents water intrusion, which is the primary concern. The small screw holes are minimal and can be easily patched if the box is ever removed.
Q: What are the best low-maintenance plants for a north-facing window box?
A: North-facing boxes receive little direct sun. Excellent choices include impatiens, begonias, fuchsia, coleus (for colorful foliage), and trailing ivy. These plants thrive in shade to partial shade.
Q: How do I prevent my wooden window box from rotting?
A: Start with rot-resistant wood like cedar or redwood. Ensure superb drainage with multiple holes. Apply a penetrating wood preservative or sealant to the interior of the box before planting. Using a plastic liner (with drainage holes punched in the bottom) can also create a barrier between the moist soil and the wood.
Q: Is the self-watering reservoir necessary if I water daily?
A: While not strictly necessary, it acts as a crucial safety net during hot spells or if you miss a day. It promotes more consistent soil moisture, which leads to healthier root systems and less plant stress, making your window garden more resilient and forgiving.